.svg)
How To Change the Gear Lube in a 75hp and Higher Mercury FourStroke Outboard
Changing the gearcase lubricant in your 75hp and higher Mercury® FourStroke outboard* is routine preventive maintenance that will help keep your engine performing at its peak. Gear lube protects vital components within the gearcase, or lower unit, from corrosion and wear. It should be changed after every 100 hours of operation or at least once a year, and the job can easily be incorporated into the annual winterization process.
Completing the procedure is quick and simple and requires only a minimal set of tools. As always, before you begin, you should review the process and collect the necessary supplies as outlined in your engine owner’s manual.
If you’d like to see the process in action, check out this helpful how-to video from our friends at 75hp and higher Mercury® FourStroke outboard*.
Essential Tools
Changing the gear lube requires minimal tools. You’ll need:
- Ratchet wrench with a 1 1/16-inch deep-well socket or Quicksilver 1 1/16-inch Floating Prop Wrench (Part No. 859046Q4)
- Quicksilver Floating Prop Block (8M0129072) or a block of wood
- Oil catch pan
- Flat-head screwdriver
- Quicksilver Gear Lube Pump (8M0072133)
- Quicksilver 2-4-C Marine Grease (802859Q1) or Quicksilver High Performance Extreme Grease (8M0071841)
- A few rags
- Safety glasses and protective gloves
Choose the Right Gear Lube
When you use premium Quicksilver SAE90 High Performance Gear Lube (Part No. 858064Q01) in your Mercury outboard, you’re protecting gearcase components against corrosion, pitting and excessive wear while extending gear life.
It’s generally best to have 2 quarts of gear lube on hand to complete the job. However, check your owner’s manual for the lubricant capacity for your specific engine and gearcase model, as the capacity varies based on the diameter of the gear housing.
Safety Precautions
The job of changing the gear lube in your outboard has minimal safety risks. However, it’s recommended to wear protective gloves and eyewear and to use the emergency stop switch to disable the engine while you work.
Also, be sure to transfer the used lubricant into an appropriate container and to dispose of it properly. Some municipalities accept it at recycling and garbage collection centers. Many automotive parts retailers will also accept it for recycling.
The Procedure
- Use the Floating Prop Block and ratchet wrench to loosen and remove the propeller nut. Then remove the remaining propeller and hub components. If needed, consult your engine owner’s manual for the proper steps to complete this procedure.
- Trim the outboard to a vertical operating position.
- Place the oil catch pan below the outboard.
- Locate the vent plug and fill/drain plug. Depending on your specific engine and gearcase model, both plugs can be located on the rear of the gear housing, adjacent to the prop shaft (as shown in the Wired2Fish video). Alternatively, the vent plug can be located on the side of the gearcase. Consult your engine owner’s manual before completing this step. Once the plugs are located, use the screwdriver to remove the fill/drain plug. Then remove the vent plug to break the vacuum, allowing the lubricant to drain out. It can take up to 30 minutes to fully drain, depending on the air temperature where you’re working. Also, make sure the sealing washers on the plugs did not stick to the gearcase when you removed the plugs.
- While you wait, inspect the prop shaft for damage, remove any fishing line that might be wrapped around it and wipe it clean. You should also inspect the sealing washers on the vent plug and fill/drain plug. Replace them if they’re damaged.
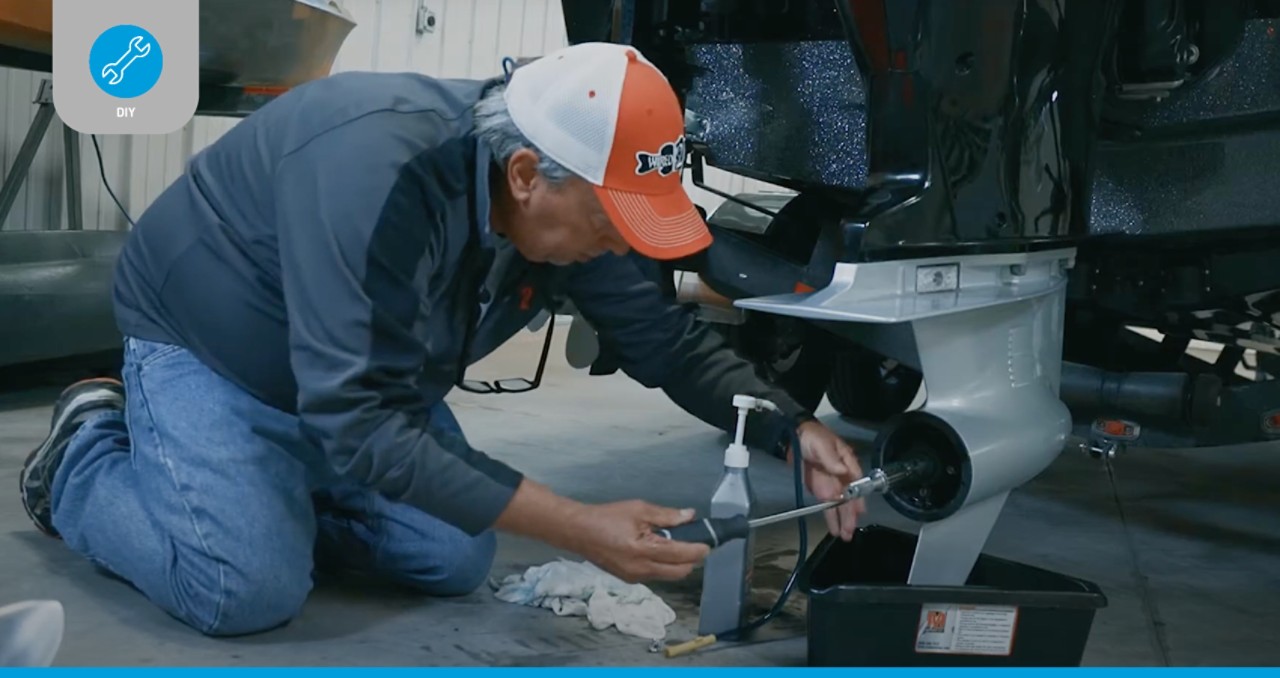
- Be sure the outboard is still in a vertical operating position and the vent plug is removed. Following the instructions included with the Gear Lube Pump, use the pump’s tube to add lubricant in the fill hole until the lubricant appears at the vent hole.
- Leaving the lubricant tube in place, reinstall the vent plug and its sealing washer.
- Remove the lubricant tube. Then reinstall the fill/drain plug and its sealing washer and wipe up any residual lubricant.
- Liberally coat the propeller shaft and splines with 2-4-C Marine Grease or High Performance Extreme Grease prior to reinstalling the propeller. Be sure to install the prop and hub components in the correct order and orientation as outlined in the engine owner’s manual.
Pro Tip: Check for Signs of Contamination
When draining the gearcase, always inspect the used gear lube for the presence of water. If water is present, it can settle to the bottom and will drain out prior to the lubricant. It can also be mixed with the lubricant, giving it a milky appearance. Water in the lubricant could result in premature bearing failure or, in freezing temperatures, can turn to ice and damage the gearcase.
Also, examine the drained gear lube for metal particles. A small amount of metal particles indicates normal gear wear. An excessive amount of metal filings or larger particles could indicate that there’s a problem.
In either case, consult an authorized marine service technician, who can determine the cause of the problem and perform necessary repairs if needed.
Protect Your Engine with Premium Quicksilver Marine Lubricants
With the right tools and premium Quicksilver products, changing the gear lube in your Mercury FourStroke outboard is a simple task to complete, and it will provide you with the peace of mind that your gearcase is protected for another season on the water.
*The processes for changing the gearcase lubricant as outlined here is for 75hp and higher FourStroke, Verado® and Pro XS® outboards. Smaller horsepower models and other Mercury outboards follow a similar process. Consult your owner’s manual for detailed instructions.
Personal Watercrafts